

This article is out of date.
Before being able to install a plug-in, you must enable Koha to accept them. This is done in 2 steps :
1. koha-conf.xml
The koha-conf.xml file is located on your server. If you do not have access to this file, ask your system administrator to do this modification for you.
Change the line
<enable_plugins>0</enable_plugins>
to
<enable_plugins>1</enable_plugins>
2. System preferences
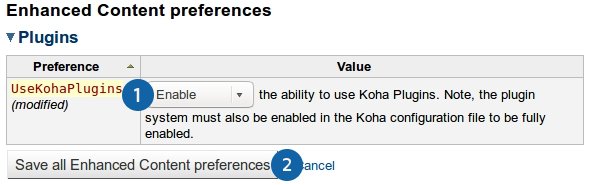
Go to your Administration module and search for the UseKohaPlugins system preference.

Then, set the UseKohaPlugins preference to Enable and make sure to save the setting by clicking the Save all Enhanced Content preferences button.
Once this is done, you are ready to install your plug-in !
To do so, go to the plug-ins page (Tools > Tool plugins) and click the Upload plugin button.
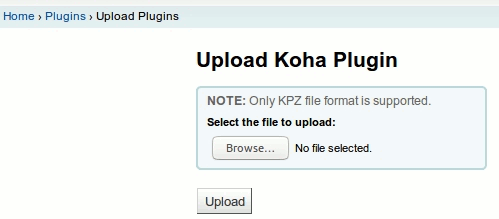
By clicking this link, you’ll be ask to browse and upload the .kpz file you previously downloaded from our plug-ins page or from any other locations.
Your plug-in should then be listed in the installed plug-ins list.