After creating a budget and a vendor’s profile, you may proceed with these steps:
Create baskets
Go to Acquisitions
Search for your vendor
Click on “New basket”
Give your basket a name
Save your basket
Click on “Add to basket” to order an item
Search for an existing record or create it from scratch
Click on “Order” next to the record
Enter the financial information
Click “Save”
Repeat steps 6-10 for each item you need to order.
Click on “Save”
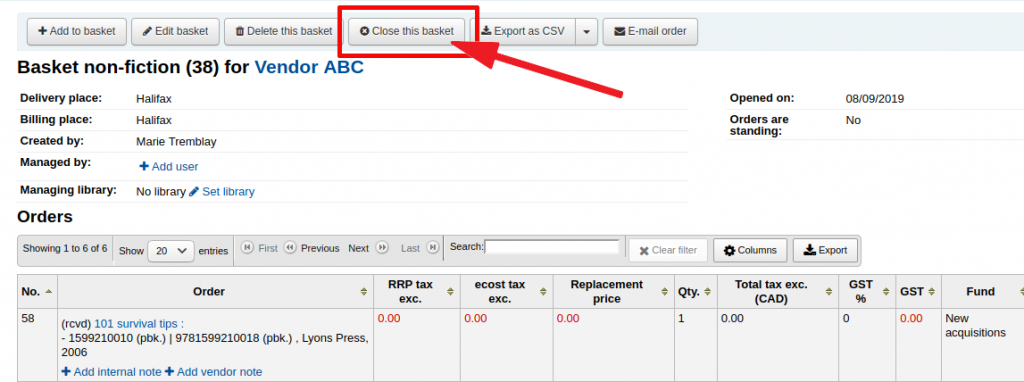
Once it is completed, click on “Close this basket.”
You must close a
basket in order to update the budget automatically and add the order
amount to the “Base-level ordered” column of the
corresponding fund.
Closing the basket will also enable the “Receive shipment” option, so you can create an invoice and mark item as received.
When you have received your order from the vendor
Go to Acquisitions
Search for your vendor
Click on “Receive shipments”
Enter the invoice number
Click “Next”
Check the “Receive” box next to the title
Make sure the price is correct, adjust it in “Actual cost” if needed
Click “Save”
Redo steps 6-8 for every item on the invoice
Click “Finish receiving”
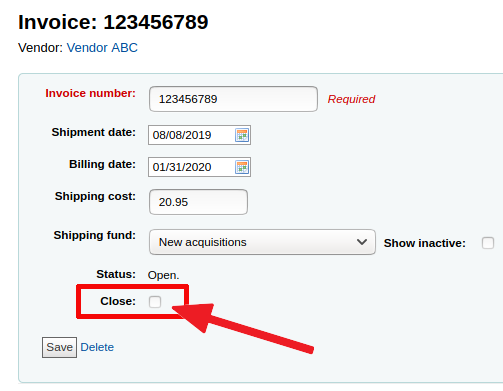
Once you have paid your vendor, update your invoice
Go to Acquisition
Search for the invoice
Click on the Invoice number
Add a “Billing date”
Add an adjustment (if needed)
Check the “Close” box to close the invoice
The invoice amount is only subtracted from your budget fund when the invoice is closed.